Famicom Disk Systems without the disks
A working Famicom Disk System is one of the pinnacles of retro console collectibility and even if one does acquire a good example it’s only a matter of time before it reverts back to its natural state of brokenness. Luckily it’s possible to replace the most fragile part of the FDS – the drive itself – with a PC and play games on original hardware, but without the inherent fragility of a twenty-five year old floppy disk drive.
To replace the drive you need five things:
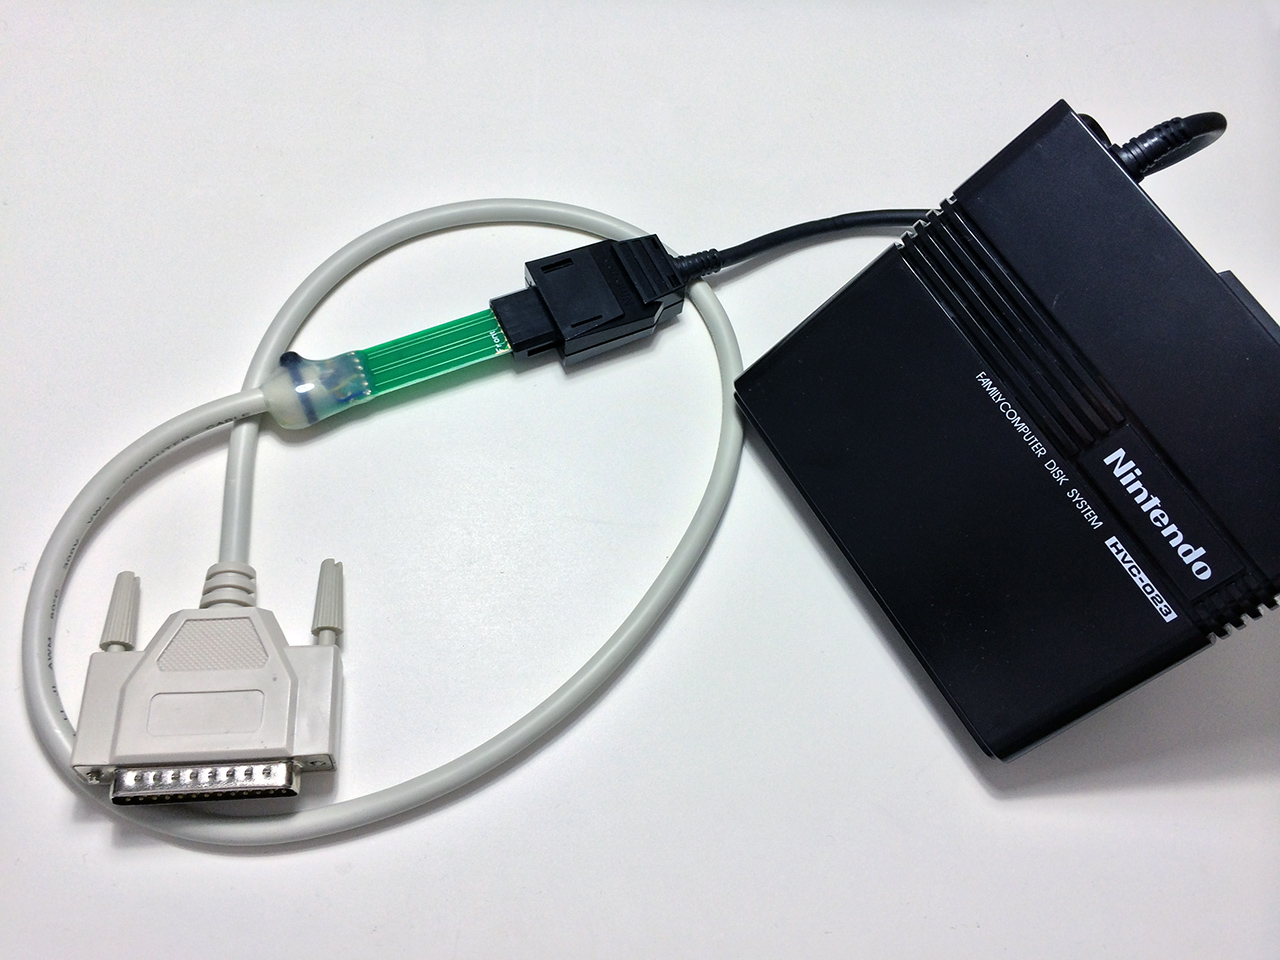
- An FDS RAM adapter – the black thing that plugs in to Famicom cartridge slot and thence (usually) on to the drive itself.
- An FDSLoadr RAM cable; this connects the RAM adapter to the parallel port of a PC.
- A copy of the FDSLoadr software.
- A copy of DOS or some DOS compatible operating system (e.g. DR-DOS, FreeDOS).
- A computer that’s fast enough to run the software (must be a Pentium or better), but old enough to have a real parallel port (no, a USB to parallel port adapter won’t cut it).
It’s possible to make your own cable – see this Famicom World tutorial – but I just bought a readymade one from ToToTek. The FDSLoadr software can be found at NesDev and as far as DOS is concerned you can’t go far wrong with FreeDOS.
FDSLoadr cable and Famicom Disk System RAM Adapter:
A slightly more problematic issue these days is tracking down a computer that will run the software and has the prerequisite parallel port. According to the FDSLoadr README the fast the computer, the more accurate the software’s emulation of the drive. However it is timing critical, hence the need for a non-multitasking operating system and a real port. Luckily I had an old Toshiba Satellite 1800 laptop sitting in a cupboard. It has a PIII process and a real parallel port; which made it ideal for the task.
With FreeDOS installed and FDSLoadr copied on to the PC along with a couple of FDS game images; all that remains is to connect up the cable with the RAM adapter. With my store built cable there’s a handy “front” label that is aligned with the bevelled side of the RAM adapter cable (see image below).
The “front” of the FDSLoadr plug aligns with the beveled edge of the RAM adapter plug:
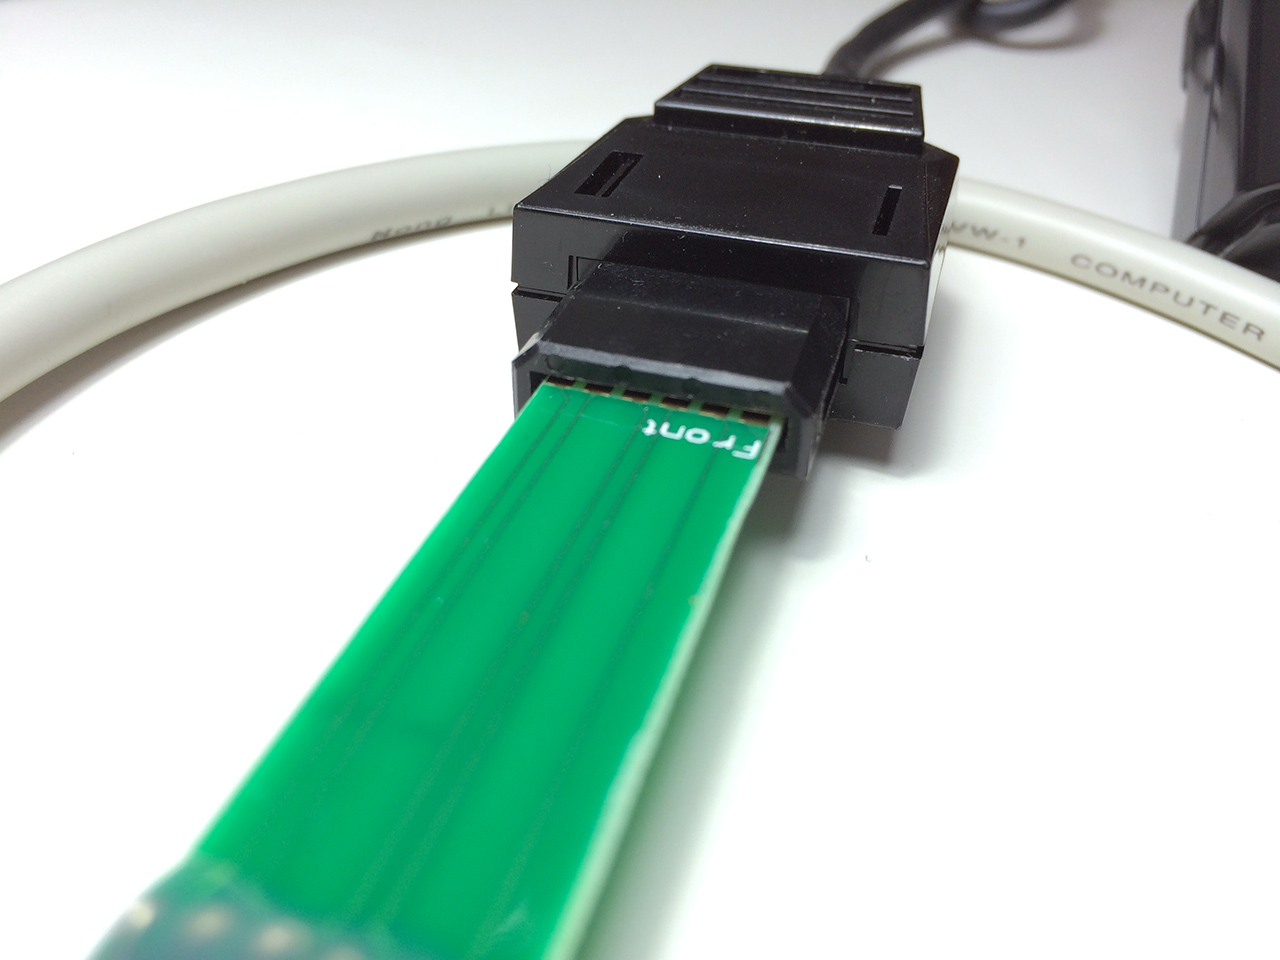
Image Issues⌗
There’s one remaining pitfall that can befall you here; the FDS images themselves. FDSLoadr will only accept images with a certain 16 byte header attached and not all game dumps on the internet have this header. To ameloriate the problem I’ve put together a small program that will add the header to an image that lacks one, while leaving other images untouched. The program can be downloaded in source form from Github (which can be built for any Unix like system) or as a prebuilt 32bit DOS binary.
Running it all⌗
With everything in place it’s time to put the setup to the test. Start FDSLoadr with the image or your choice and press SPACE to unset the disk (the equivalent of ejecting the disk). Then turn on the Famicom and the usual FDS startup screen should appear. Press SPACE to set (i.e. insert) the disk and the game should start loading. If there’s a disk error then you may have fallen foul of a timing problem. Restarting the console and the FDSLoadr software has always resolved these problems for me. For double sided disks you can use the 1 and 2 keys to switch between the sides.
Below is proof that, with a bit of luck, it can actually work…